|
Geocoding is a process where information is made location specific. For example; a topographic map provided by the ordnance survey or a areal photo needs to be located precisely on the right coordinates. Geocoding is not only for raster maps and images but also for databases.
In our case we will geocode a topgraphic map wich is provided by the Dutch Ordnance survey. The original map is issued in geotiff format. Geotiff is not supported by Radio Mobile (TIFF is suported, not GEOTIFF) which is for this example converted in to PNG and in addition is compressed as the original file is over 60 MB in size.
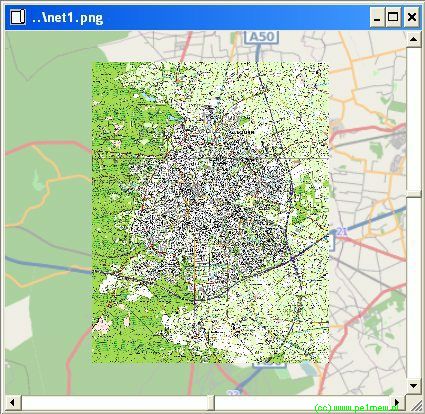
 The Topographic map of my own town. The Topographic map of my own town.
Corner coordinates.
The first step is to find out the corner coordinates of the raster file. This can be done by using the information provided with the map or by orienteering on other maps. Radio Mobile can support both methods of geocoding.
Coordinates must be in Latitude Longitude, (format: degrees.decimal-degrees) map date WGS84. We will describe 3 ways of geocoding:
- Using coordinates and the 'picture properties' in Radio Mobile,
- Using the coordinates and the 'picture properties' in Radio Mobile,
- Creating the associating 'mapfile.dat' for the raster image
Using coordinates
In this case we know the coordinates from the source.
The upper left corner is:
Longitude: 5.900392 E
Latitude: 52.262913 N
The bottom right corner is:
Longitude: 6.045205 E Latitude: 52.149844 N 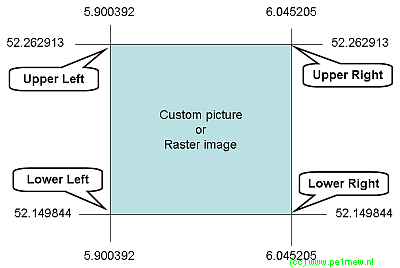
Now we have to perform the following steps:
- Open the raster image using: 'File > Open picture' or the
 button in the toolbar. button in the toolbar.
- Select the raster image and click 'open'
The image is now loaded in Radio Mobile. It will display the map at a zoom size of 100%. When the map is used after geocoding the zoom level will be scaled with respect to the active map window.
- Make the new opened picture the 'current window' by selecting it. It should have a dark coloured bar on top.
- Open the 'picture properties' function through 'File > Picture properties' or use the
 icon in the toolbar. icon in the toolbar.
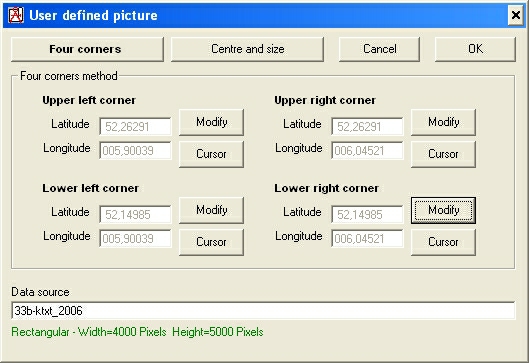
- Enter the coordinates for all corners using the 'Modify' button using the information in the following image.
- Enter the comment or source of the image at 'Data source´
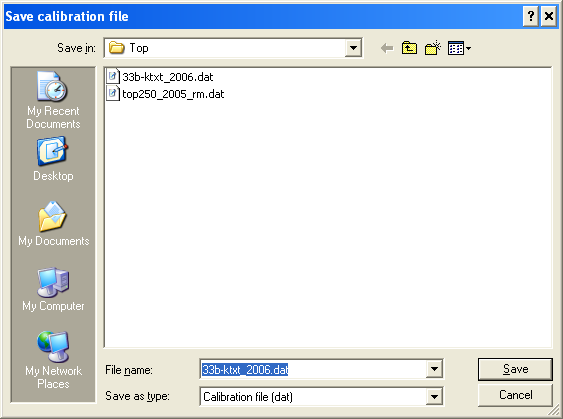
- Save the geocode file with the same name as the picture or raster file at the same place as the picture or raster image.
- Your picture is now geocoded and can be used in your analysis. More on using custom pictures in 'Edit > Merge pictures > Another picture'
Result of the geocoding process.
Using cursor
Instead of using direct coordinates it is possible to do a rough guess using the cursor coordinates.
Perform the following steps:
- Open the raster image using: 'File > Open picture' or the button in the toolbar.
- Select the raster image and click 'open'
The image is now loaded in Radio Mobile. It will display the map at a zoom size of 100%. When the map is used after geocoding the zoom level will be scaled with respect to the active map window.
- Open a new map with another source of raster map. In this example we will use Open Street map.
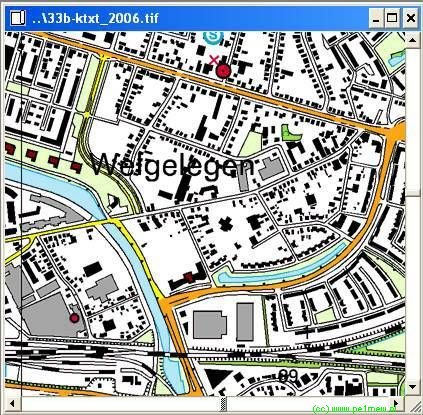
- Position both windows beside each other using 'Window > Tile vertical'. See for a example the following image:
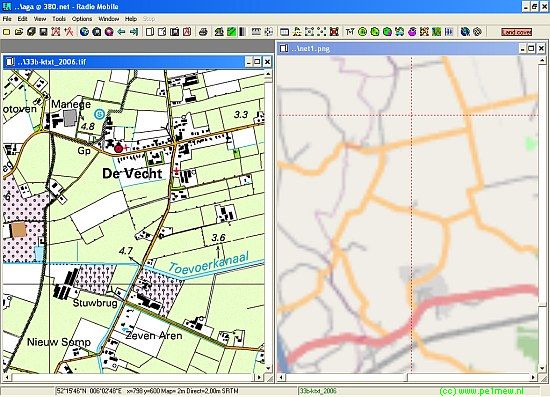
- Move the custom image to the upper right corner of the picture. In the example above the right window.
- Select the window with the other mapsource.
- point the cursor at the location that corresponds with the upper right corner of the custom picture.
- Select the window with the custom picture.
- Open the 'picture properties' function through 'File > Picture properties' or use the icon in the toolbar.
- Select 'Cursor' at the upper right information part. The coordinates from the cursor position is now copied in to the latitude and longitude fields.
- Save the modification using the 'OK' button. Save the geocode file with the same name as the picture or raster file at the same place as the picture or raster image.
- Perform action 6 to 11 for all 3 other corners.
- Your picture is now geocoded and can be used in your analysis. More on using custom pictures in 'Edit > Merge pictures > Another picture'
Using Mapdata.dat file
With this method a corresponding file is created manually. This is appropriate and less time consuming than the prior given procedures.
- Create a file named equal to the raster file you wish to geocode with the '.dat' extention.
- Open the mapdata.dat file with your favourite text editor
- populate the file with the coordinate information, and a comment. More information about the 'mapfile.dat' format at 'mapfile.dat format'
| mapfile.dat |
2
3.34722,53.55589
7.15883,53.55589
7.15883,50.73557
3.34722,50.73557
Kadaster |
- Save the file
- Your picture is now geocoded and can be used in your analysis. More on using custom pictures in 'Edit > Merge pictures > Another picture'
Result of the geocoding process.
|